Recording audio on Windows 11 is a simple process that can be done using the Windows 11 built-in apps and 4k screen recorders such as Gemoo Recorder. In this article, we will guide you through the steps to record audio on Windows 11 with the help of these popular tools.
Does Windows 11 Have a Recorder?
Windows 11 is the latest operating system from Microsoft, and it comes with several new features and improvements. One of the most anticipated features is the built-in screen and audio recorder. These tools allow you to capture your screen activity and save it as a video file.
The built-in screen and audio recorder in Windows 11 is easy to use and comes with several options to customize your recording. You can choose to record your entire screen or a specific window, and you can also select the audio source for your recording. Additionally, you can set the video quality and frame rate for your recording.
Continue reading and learn how to record audio on Windows 11 using its built-in tools and a popular third-party application.
Way 1. Record Audio on Windows 11 via Gemoo Recorder
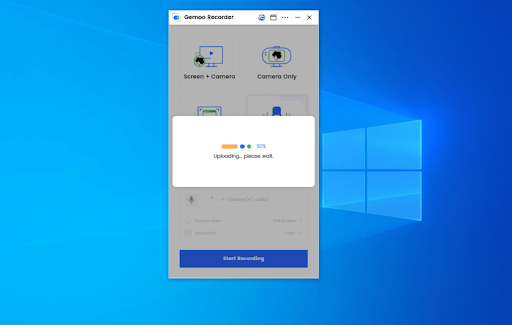
Need a reliable audio recorder that can work on Windows 111? Look no further than Gemoo Recorder! This user-friendly, open-source software allows you to record audio, video and webcam with ease. With its rich recording features, you can capture sound from multiple sources – either from your internal system sound or from your external microphone.
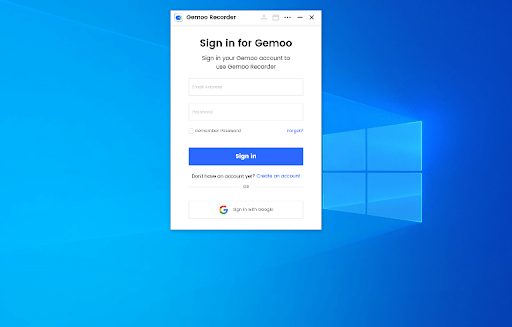
Step 1. Go to the Gemoo Recorder website and download the software to your Win or Mac computer. Open Gemoo Recorder and sign in to it by following the on-screen steps.
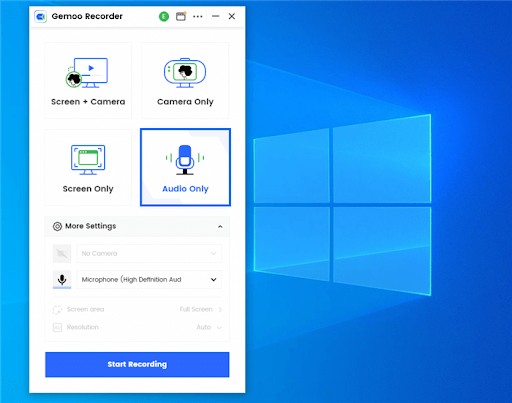
Step 2. Choose the Audio Only mode and complete relevant settings.
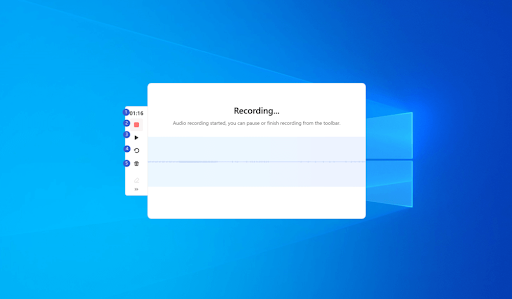
Step 3. Click on the Start Recording button to start the recording procedure. You can pause and resume the recording by clicking on the “Pause Recording” button.
Step 4. Click on the Red Stop button to stop the recording. The recorded audio will be uploaded and saved automatically.
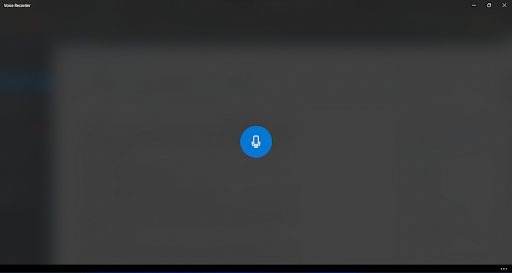
Way 2. Record Audio on Windows 11 via Voice Recorder
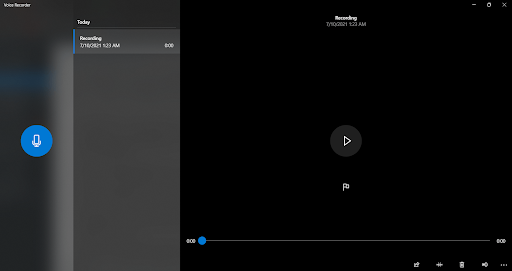
The Windows 11 Voice Recorder is a powerful tool that offers a range of features and benefits for users. Whether you need to record lectures, interviews, or meetings, the app’s high-quality recording capabilities, pause and resume feature, and transcription capabilities make it an excellent choice.
Besides, the Windows 11 Voice Recorder also has a built-in transcription feature that allows you to transcribe your recordings into text. This is a great feature for those who need to transcribe interviews, lectures, or meetings quickly and accurately.
Here are the steps to use the Voice Recorder app to record audio on Windows 11.

Step 1. Open the Voice Recorder app: Tap on the Start menu and search for “Voice Recorder”. Click on the app to open it.
Step 2. Start recording: Click on the “Record” button to start recording. You can pause and resume the recording by clicking on the “Pause” button.
Step 3. Stop recording: Click on the “Stop” button. The recorded audio will be saved automatically.
Step 4. Save the recording: Click on the “Save” button. You can choose the location where you want to save the recording.
Way 3. Record Audio on Windows 11 via Game Bar
Are you looking for a quick and easy way to record audio on your Windows 11 device? Look no further than the built-in Game Bar feature!
Game Bar is a tool that allows gamers to capture screenshots and record gameplay footage, but it can also be used to record audio from your device. Here’s how to do it:

Step 1. Open the app or program you want to record audio from.
Step 2. Press the Windows key + G to open Game Bar.
Step 3. Click on the microphone icon in the Game Bar menu.
Step 4. Click on the “Record” button to start recording audio.
Step 5. When you’re finished recording, click on the “Stop” button.
It’s that simple! You can also adjust the audio settings by clicking on the gear icon in the Game Bar menu. From there, you can choose which microphone to use, adjust the volume, and more.
One thing to keep in mind is that Game Bar can only record audio from one source at a time. So if you want to record audio from multiple sources, you’ll need to use a third-party recording software such as the mentioned tool in this article – Gemoo Recorder.
The Bottom Line
Recording audio on Windows 11 is a simple process that can be done using the built-in apps or third-party software. Whether you’re recording a podcast, an important online meeting, a song, or a lecture, the mentioned methods in this post will help you capture high-quality audio. If you find this article useful, you can share it with your friends and anyone who need it.