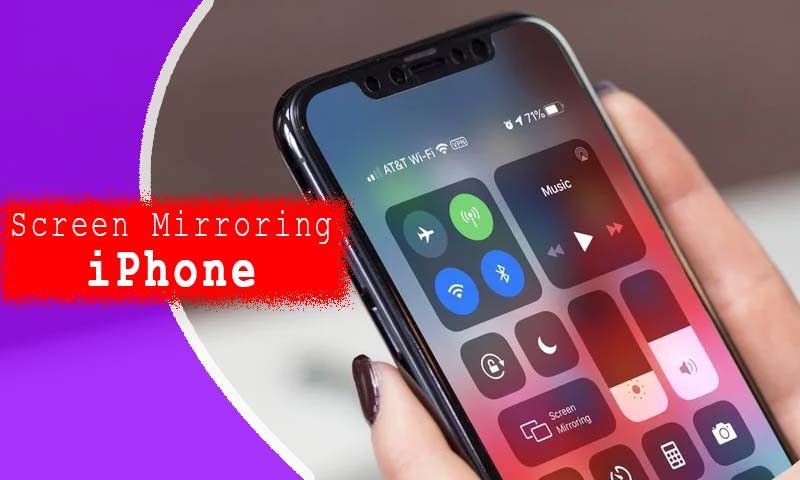
If you’re someone who owns iPhone and Roku, we have got a really easy way for screen mirroring iPhone to Roku which is a simple iPhone trick for online streaming, letting you project the pictures or videos or music that are your favorite onto your larger television screen. So below given are some of the quickest as well as the easiest steps in order to protect your eyes and make you see your media on the bigger TV screen.
How Can You Mirror iPhone to Roku?
Basically, we have got you 2 things that you’ll require screen mirroring iPhone to Roku:
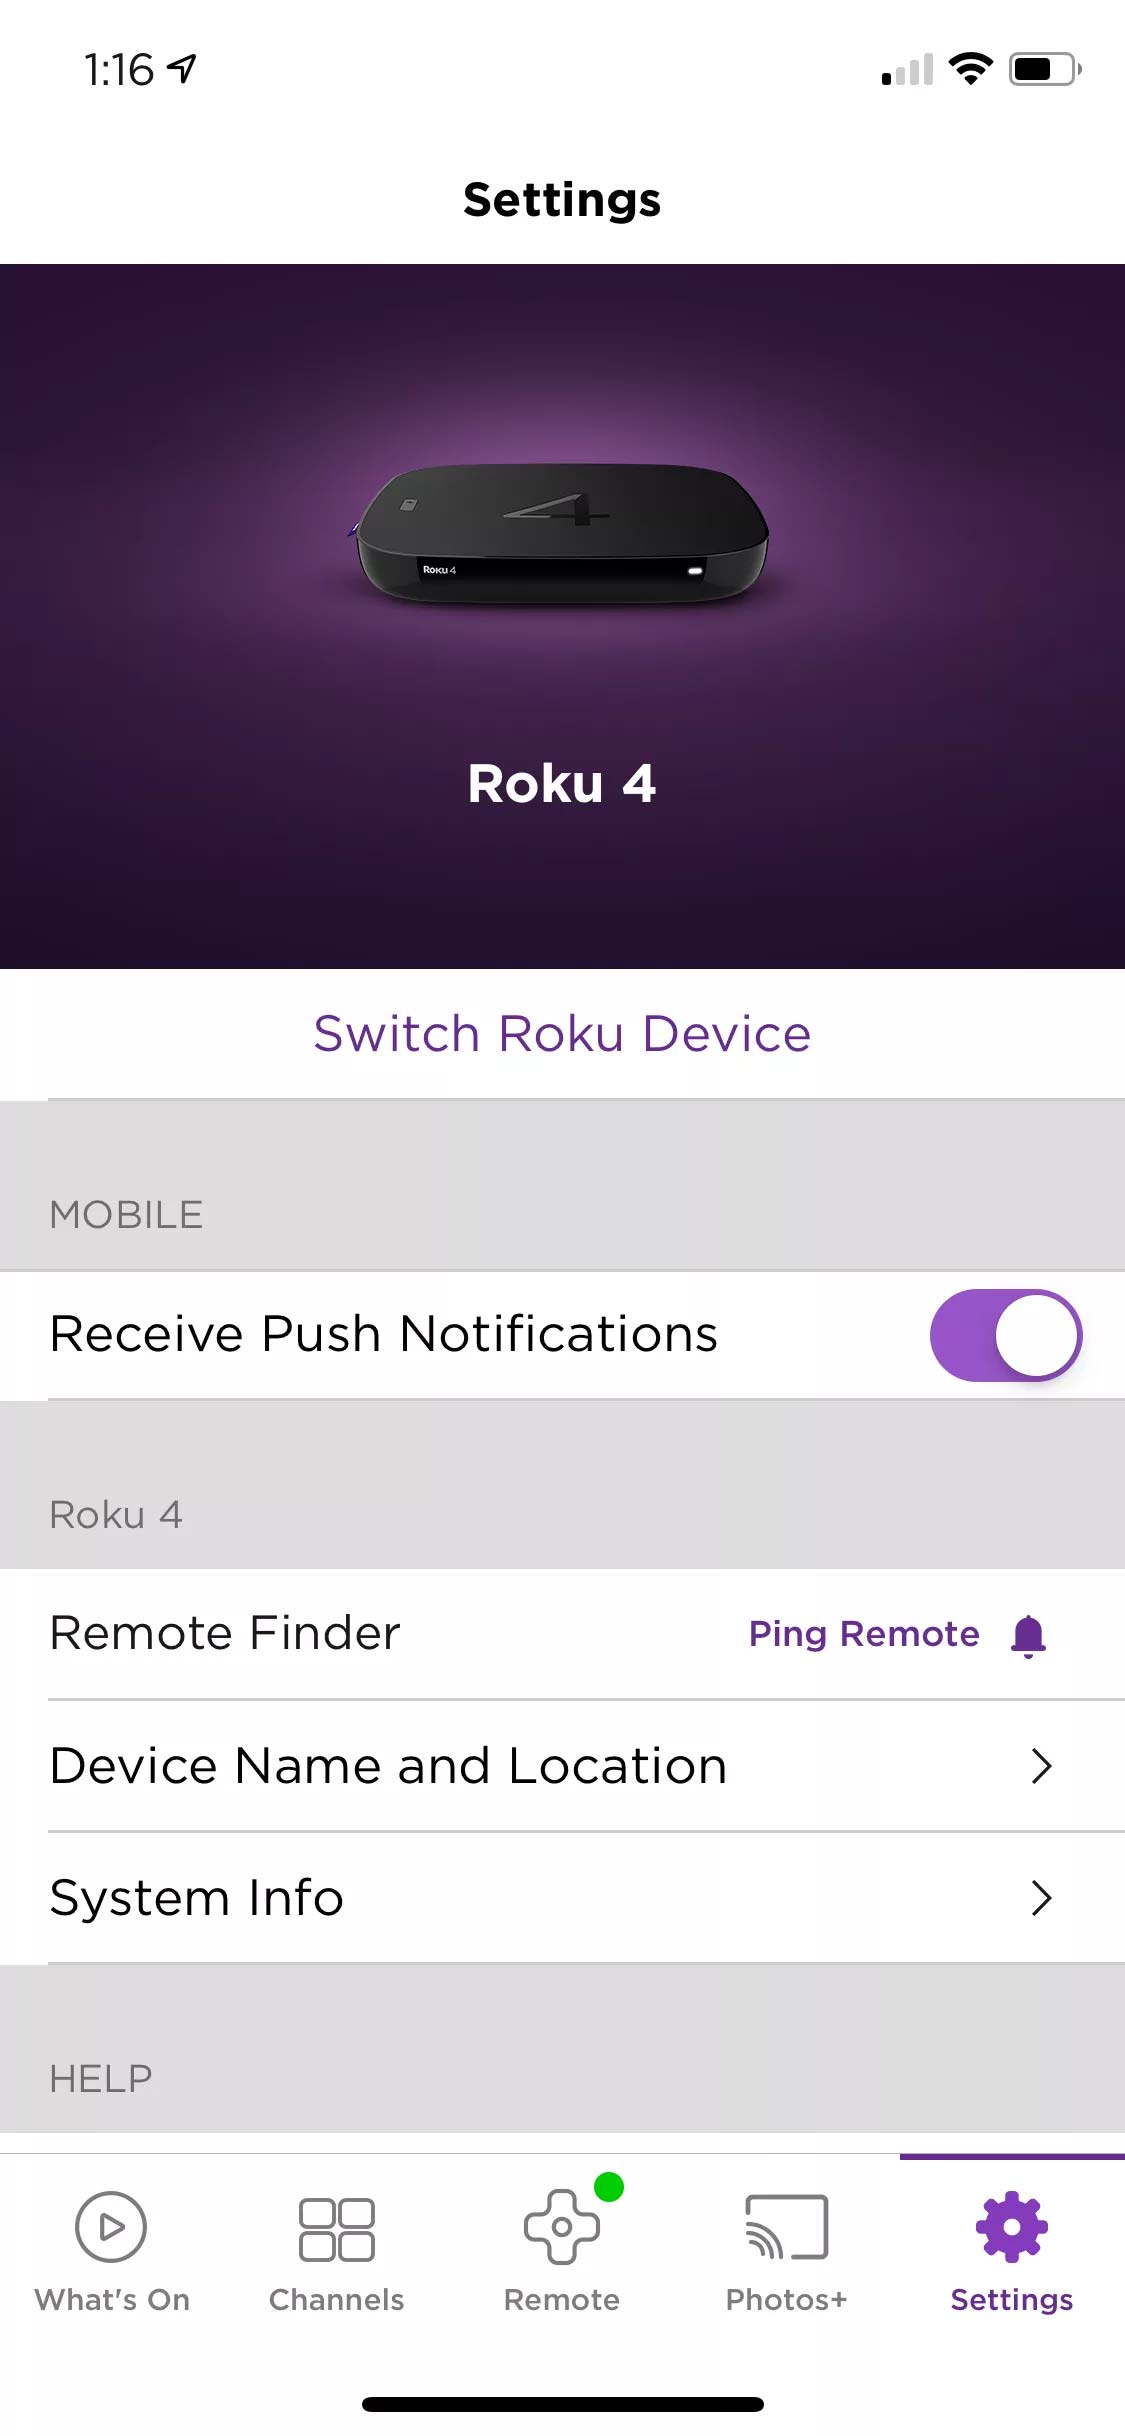
- Set up the Roku receiver
- Set up your Roku application on the iPhone
First, you’ll require making sure that your Roku receiver, as well as your iPhone, have got the same network. Moreover, you will be able to verify the network settings that you have to with your Roku receiver.
After this, you’ll require making sure mirroring is permitted to be set up on the Roku receiver.
- On the Roku, move to Settings > System > Screen Mirroring.
- Under the Screen mirroring mode, ensure verifying that either Prompt or Always allow has been selected, and then indicated via a checkmark.
Note: If you have problems with the iPhone that you have in controlling the Roku, you can go ahead and check it quickly under the Screen mirroring devices for the available blocked device. In the case, if it has been being blocked, it will start to appear under the section which says always blocked devices. Devices need to be added to this list manually, so it’s largely unlikely that you’ll get to see the iPhone here until your other family members add it.
- The next step is downloading the Roku application using the App Store on your iPhone. Open the application once it gets installed and then moves ahead and accept the Terms and Services in order to continue the setup. The Roku app at this point should start looking for a receiver.
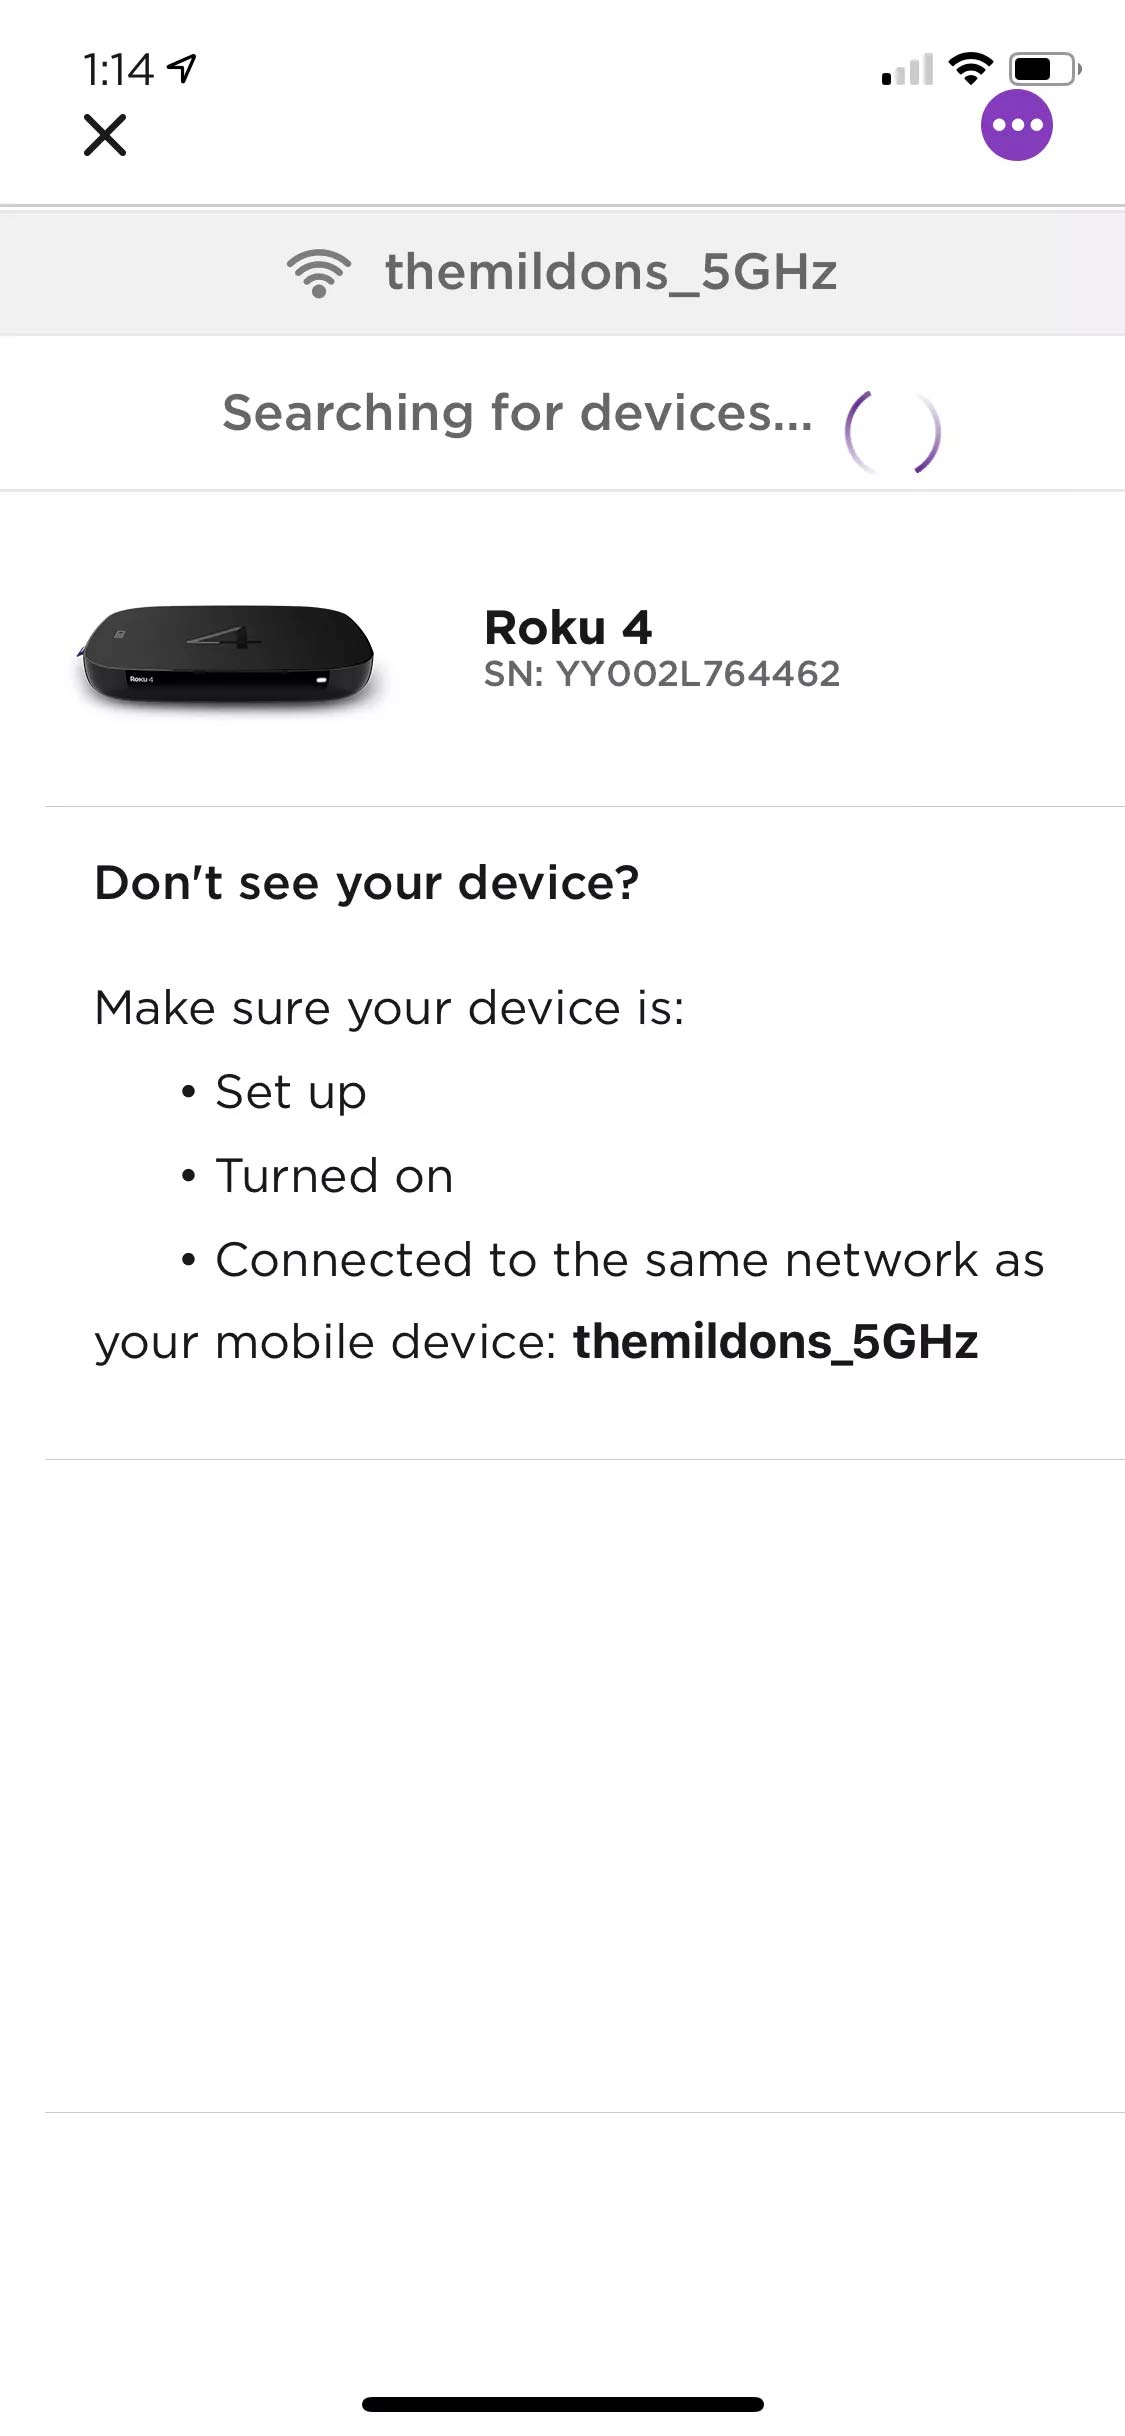
- Once a device has been found, tap the device in order to get connected.
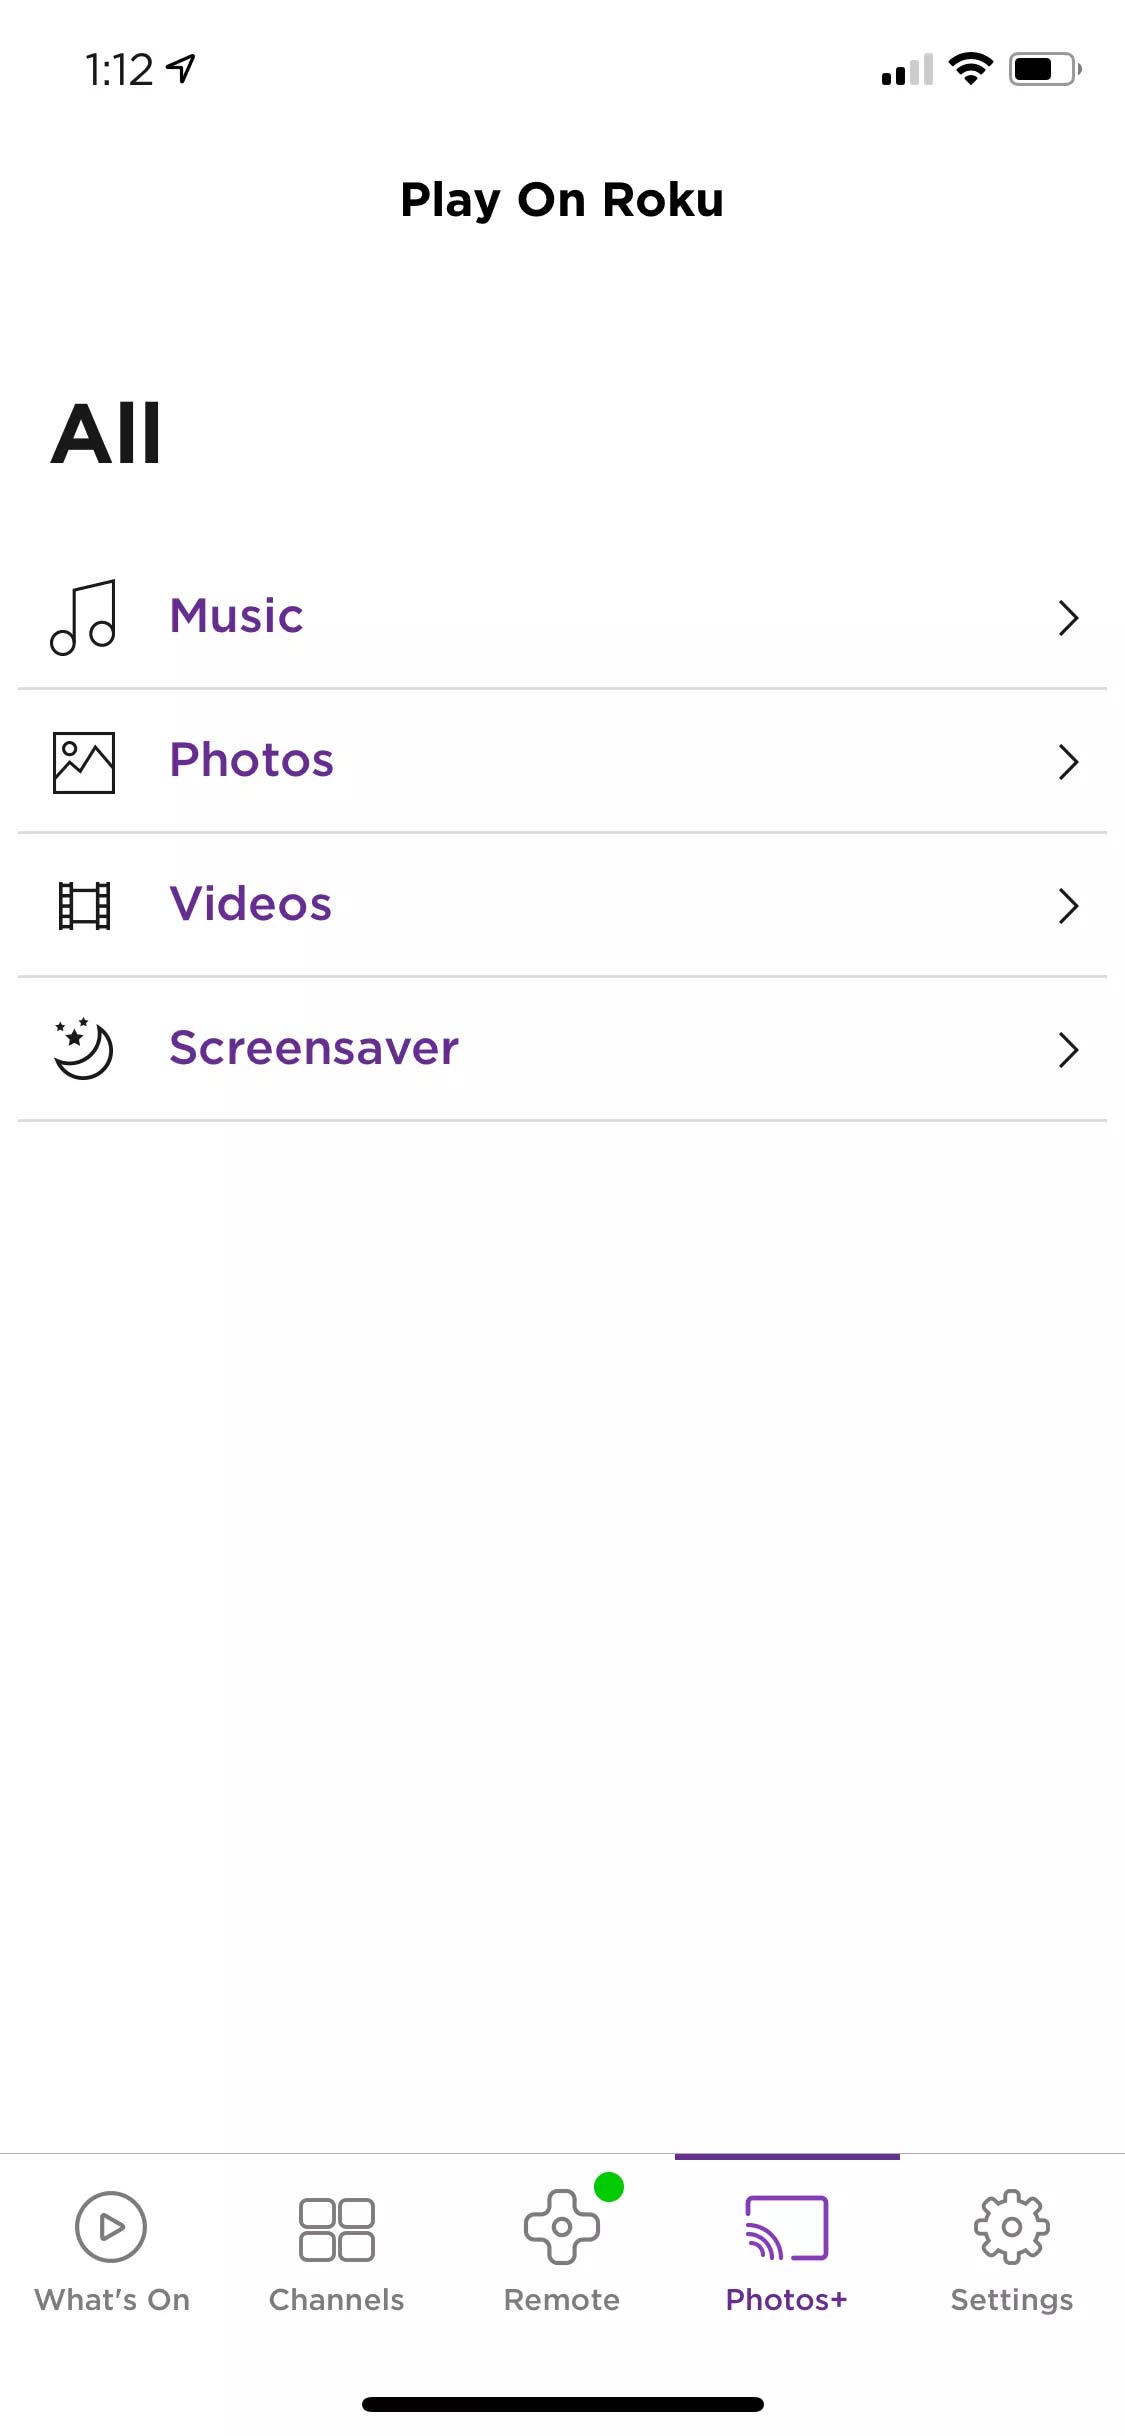
Stream iPhone to Roku with the Use of Photo+
There are some different settings options in order to help in using your Roku on the iPhone. However, Photos+ is the main setting where we are going to be highly focused on for screen mirroring your iPhone to the Roku.
- Tap Photos+ in order to start the process of mirroring.
- As per what you are looking to mirror, press Music, Photos, Videos, or Screensaver.
- Now, you’ll need to play the media that you want on your TV screen. And in order to do the same, just tap your media.
- Once you are done tapping a video, your TV will be able to display “Play on Roku” before it plays the selected media.
Mirror iPhone to Roku with the Use of Screensaver
Screensaver is one among the various mirroring features when it comes to the Roku application, which permits you to add a few of your photos for a screensaver slideshow in order to play it on the TV.
- In order to begin, tap Screensaver that you can see on the media selection screen and tap Screensaver.
- With the use of the dropdown menu, go ahead and select the source you need to utilize for the screensaver photos.
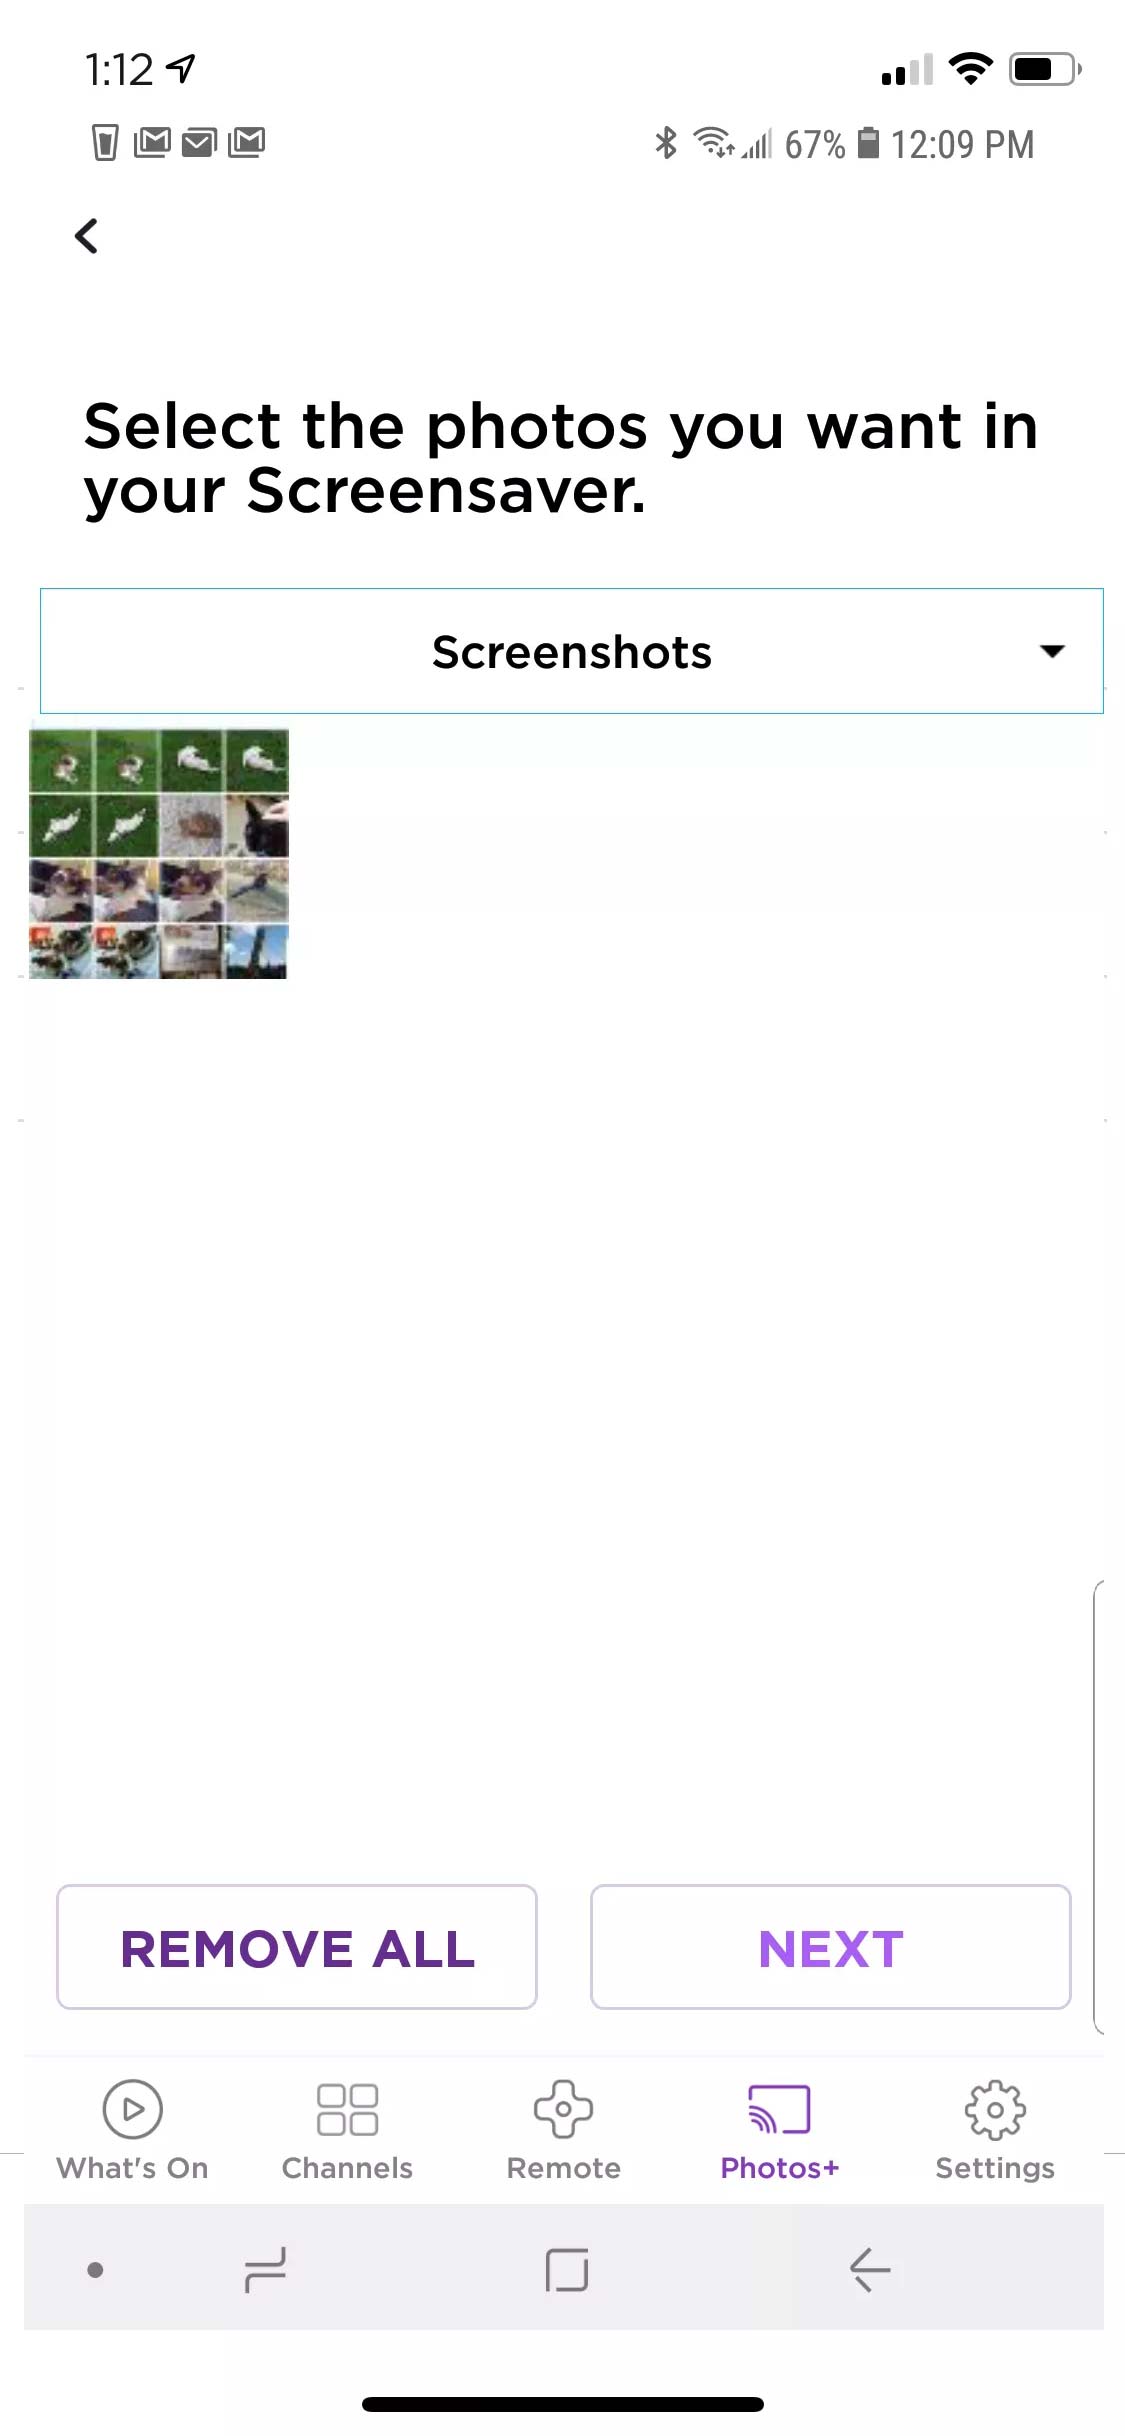
- Select each photo that you have to add. Now, you’ll be able to see a checkmark on your photos that you have already selected.
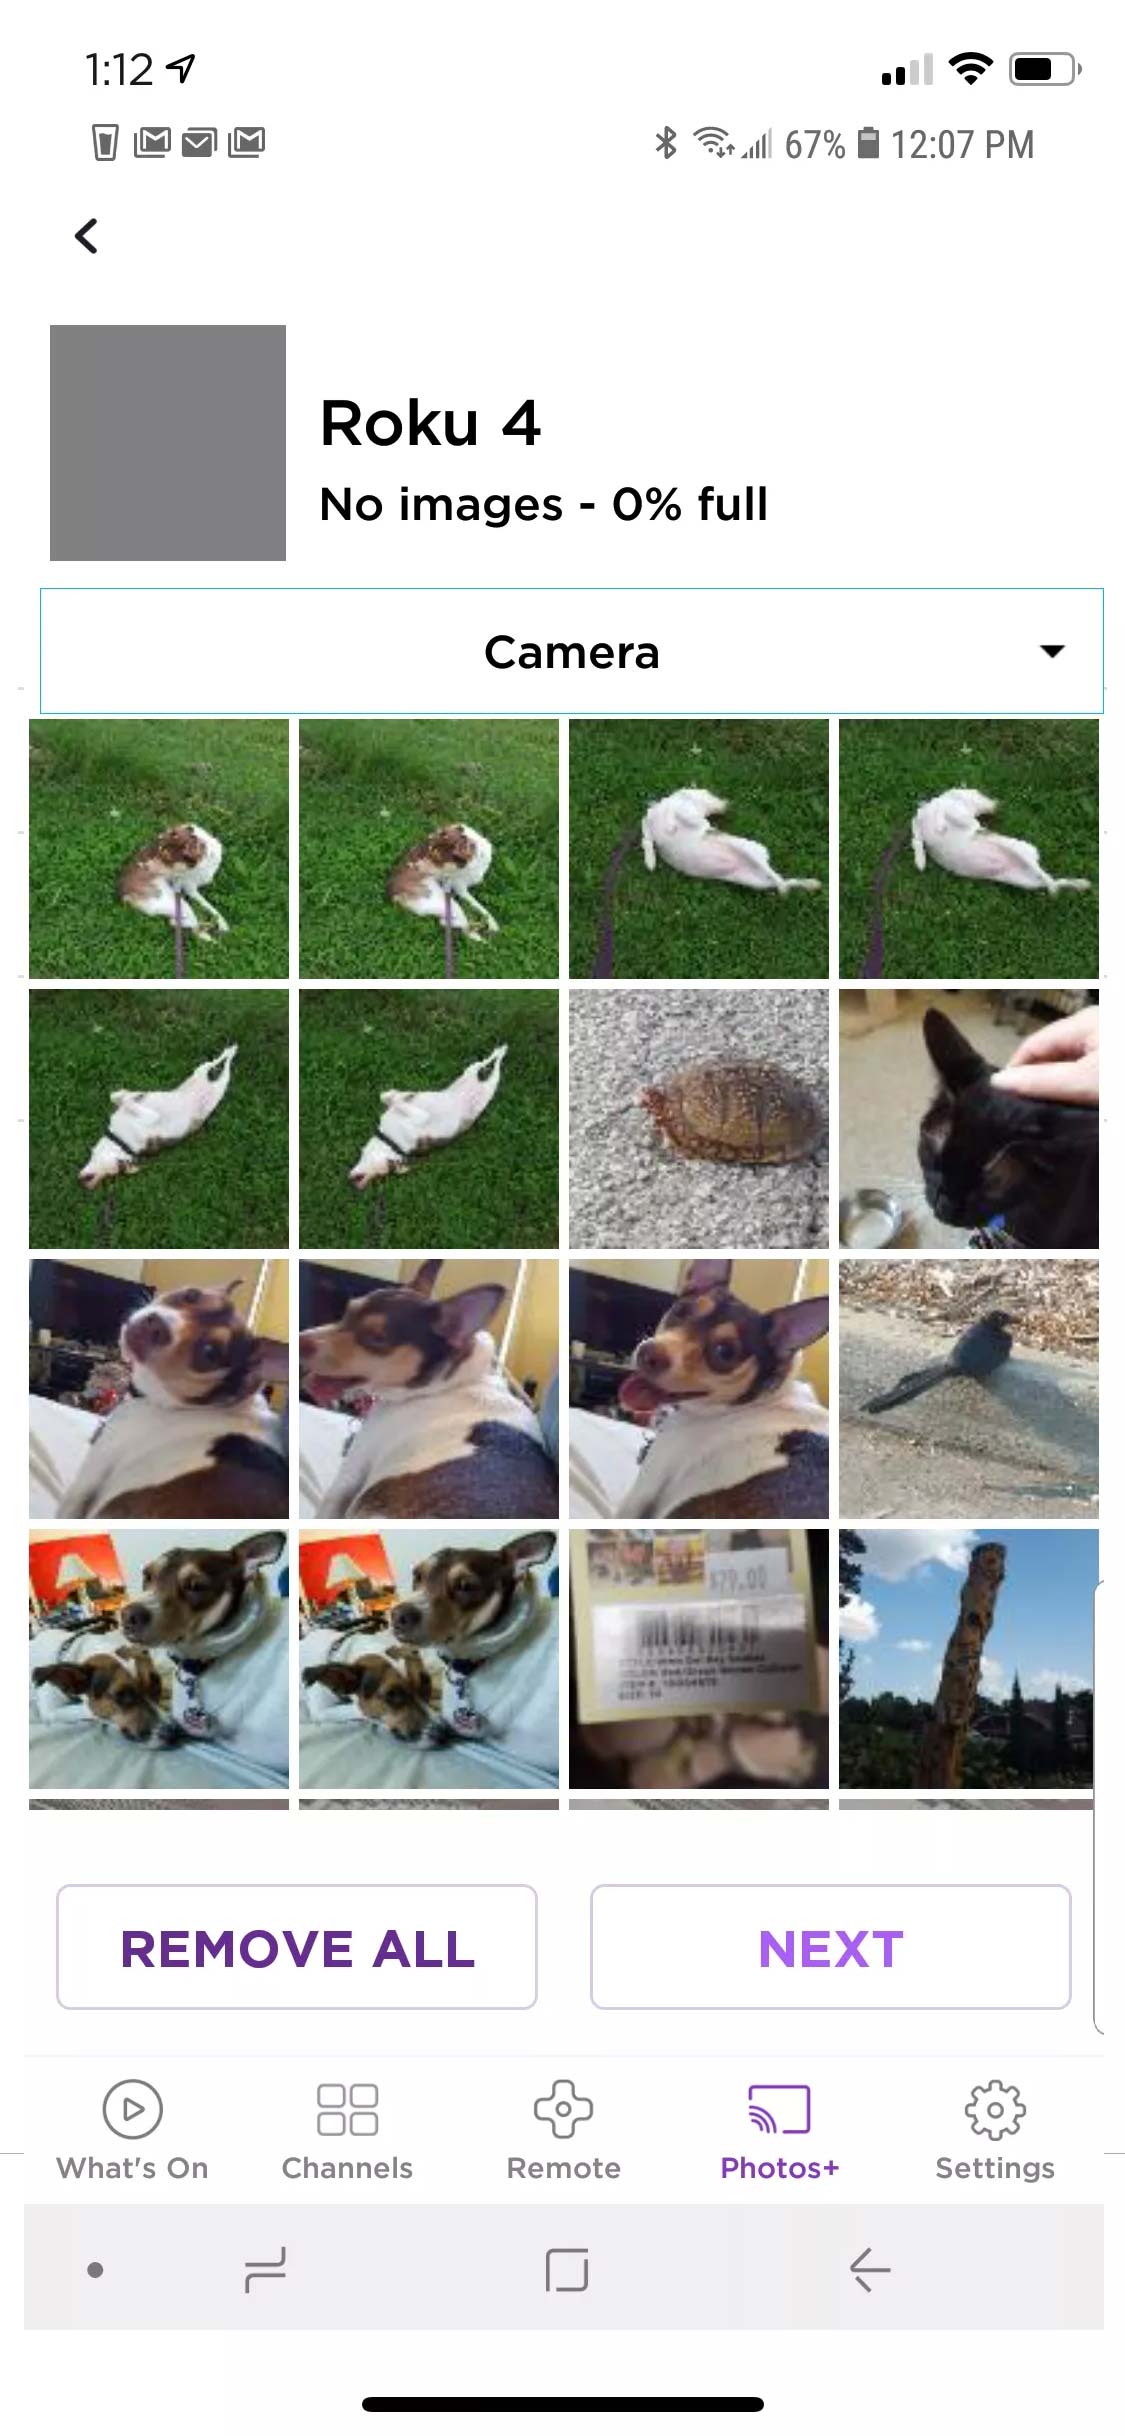
- Once you are done adding photos, select Next.
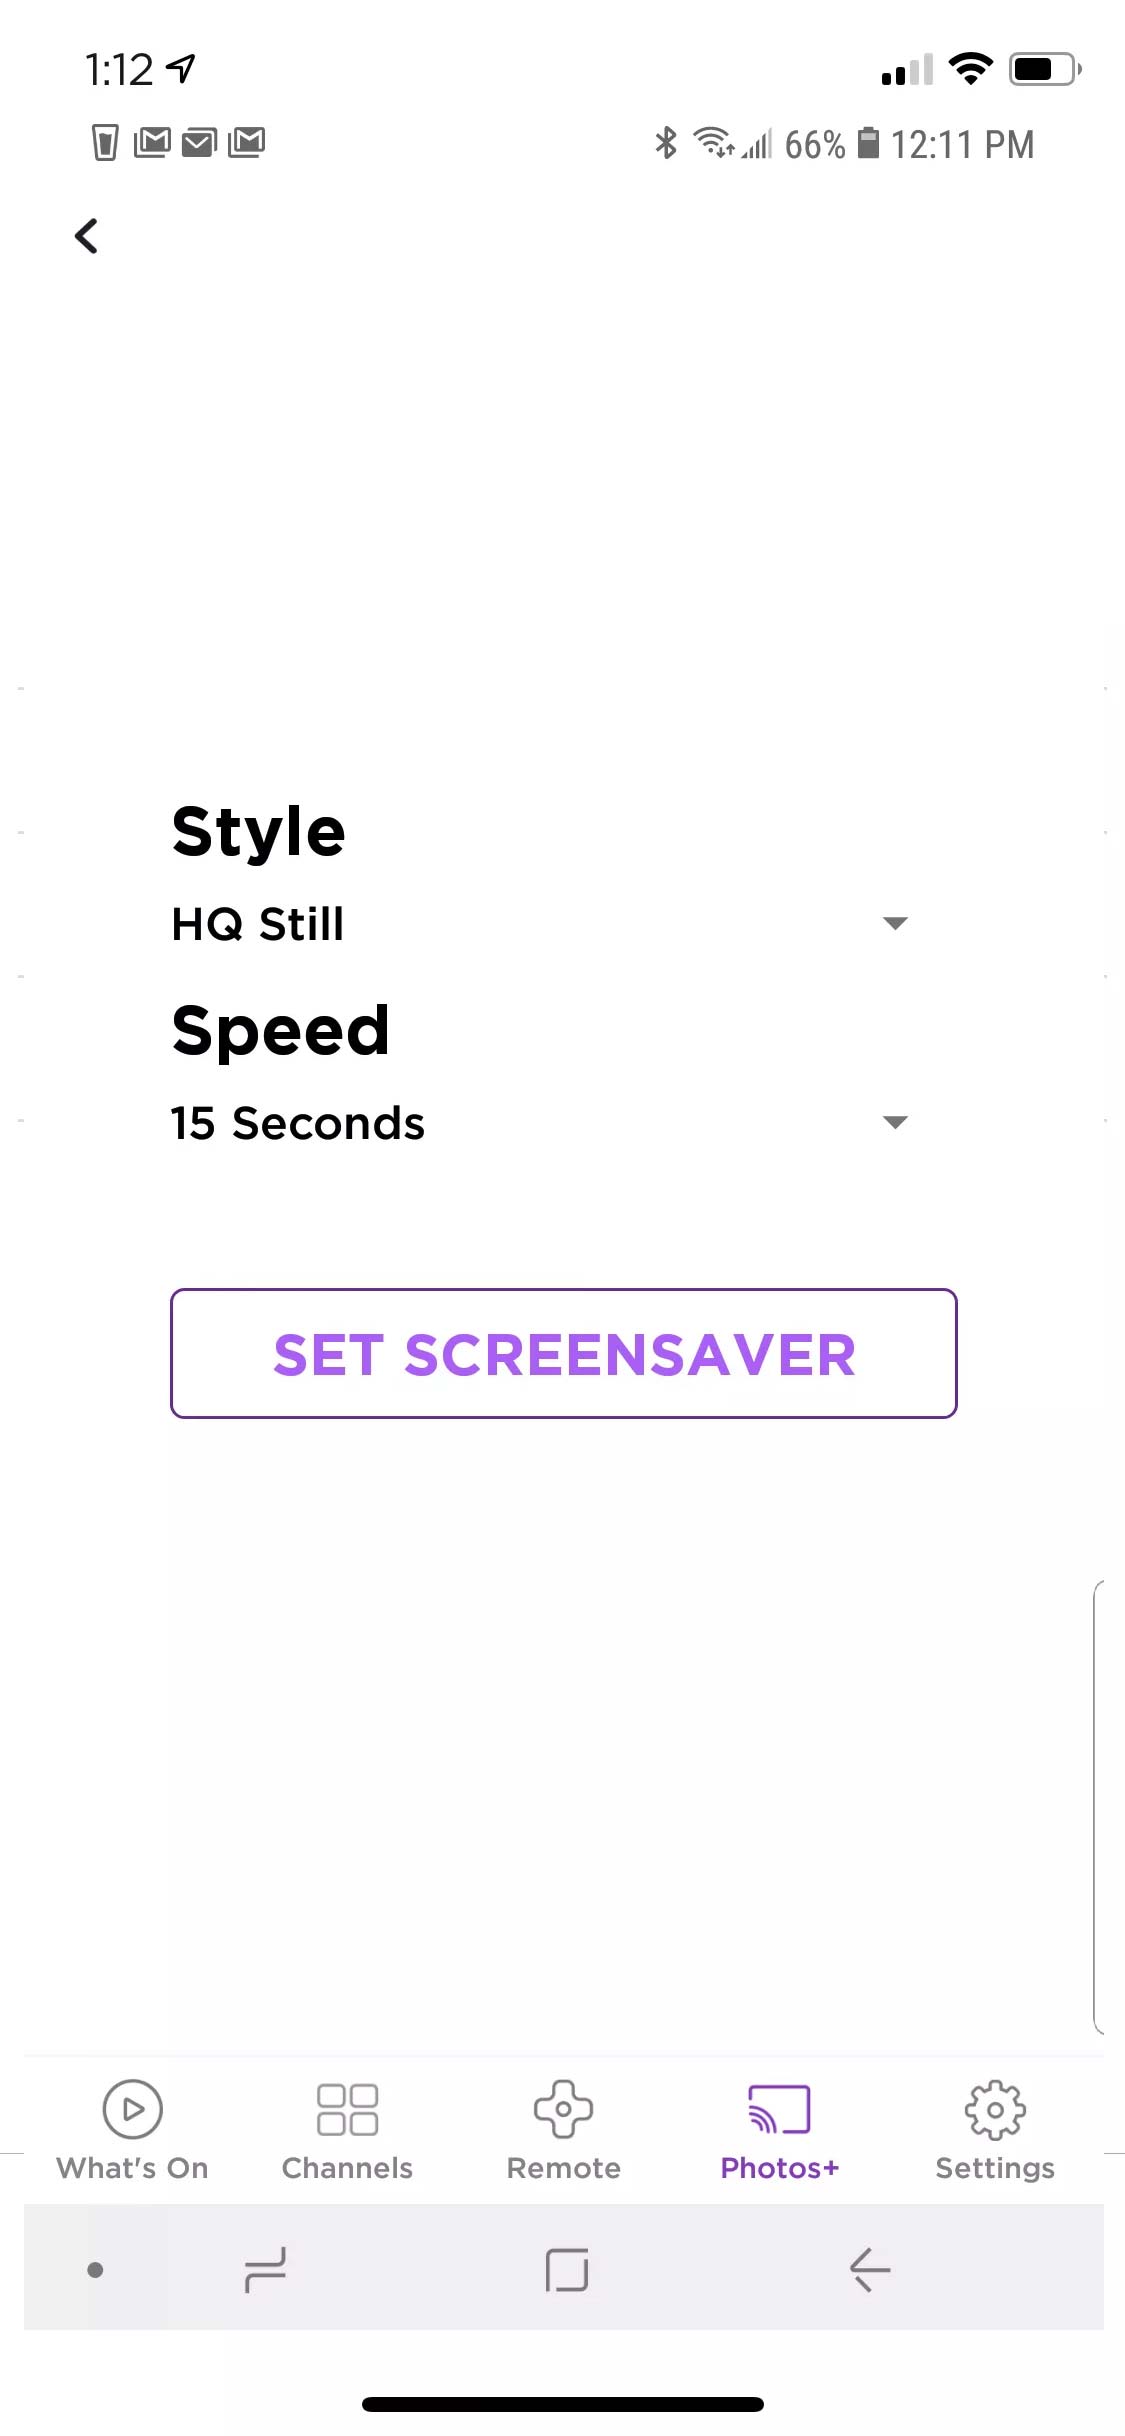
- Tap Style as well as Speed in order to adjust how you would like the photos to display, and after that, tap Set Screensaver.
- Tap OK in order to set the screensaver or simply tap Cancel to begin again.

- You should be able to see the screensaver start to play on the TV.
How You Can Screen Mirror your iPhone to Your TV?
Don’t get paused while streaming your video or playing your games especially on a smaller screen—you should utilize your iPhone or iPad which have larger displays with the use of screen mirroring techniques. There are some ways in order to stream iOS content on a bigger TV screen, projector, or the HDMI-compliant display.
There also is quite a difference between mirroring or just outputting any video. You can just utilize the iPhone that you own or the iPad in order to listen to an audio or watch a video while you browse through the web or social media at the once. Here is how it functions:
1. Send Video or Mirror the Screen Using AirPlay
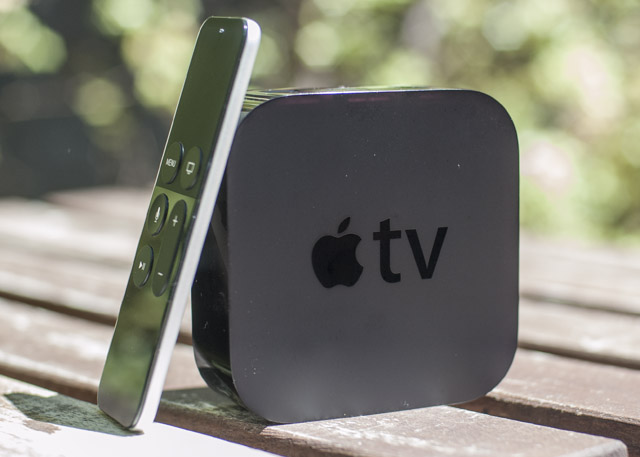
AirPlay is basically a proprietary wireless display method by Apple, and it permits you for wirelessly sending a photo to the AirPlay receiver. For using AirPlay, you will have to have a receiver which is compatible with it; for example, the most common is Apple TV (from $149) for video. The Apple TV connects to the display with the use of an HDMI, which works as a set-top box. Moreover, it comes with its own apps as well as the App Store.
It has some other clean functions too which include displaying the recent photos on the iPhone and to play music from Apple Music or iTunes. If you need an output to the Mac or Windows computer instead, you are able to do that with the help of an app named AirServer ($20). Moreover, you can also purchase audio equipment which is compatible with AirPlay in order to stream music.
Mirroring Vs Outputting
Keep in mind: You may mirror the display, which keeps the screen aspect ratio of your device (e.g. 4:3 for an iPad). Or you may output the current video or use another media that will only send videos, music, as well as a few games to your TV. In most of these cases, you will need doing the latter.
In order to mirror the iPhone or iPad’s screen to the AirPlay receiver:
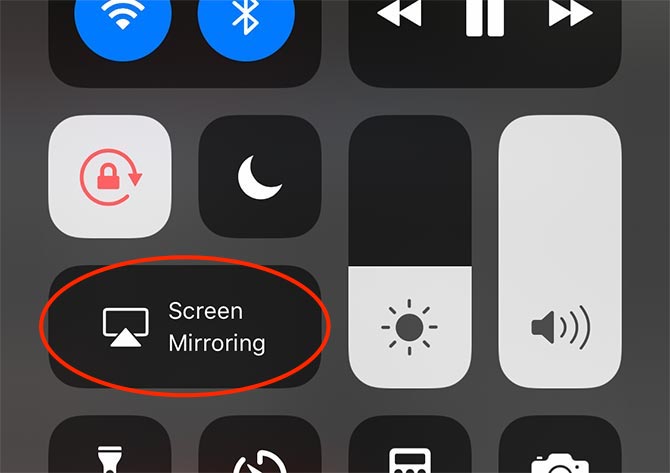
- On your device, simply access Control Center (refer the note below).
- Now, Tap the button named Screen Mirroring.
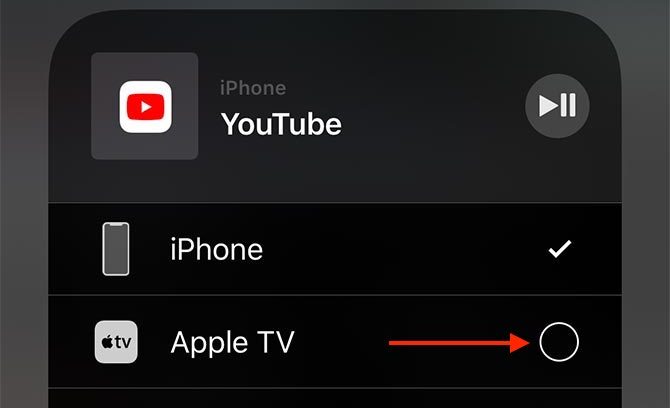
- Select your AirPlay receiver whenever it shows up.
In order to output the current video without the screen mirroring:
- On your device, simply access Control Center (refer the note below).
- 3D Touch or simply Tap the media controls for a longer duration.
- On the right-hand side, simply Tap the AirPlay button (which is like a triangle with some circles).
- Select your AirPlay receiver whenever it shows up.
Aren’t you sure about “how to access Control Center”?
- Using an iPhone X or later, you will have to swipe down from the top-right which is in the corner of the screen.
- In the case of an iPhone 8 or previous, you will have to swipe up from the screen’s bottom.
- iPad users may double-tap the Home button in order to bring the App Switcher up.
While AirPlay is a connection that is wireless, you will get that interference, older Bluetooth devices or slow Wi-Fi or/and similar may impact the overall performance negatively. So while you play a game, you’ll likely be able to notice a slight delay between what you can see on the screen and the input.
But in order to listen to music, watch videos, give presentations, share a photo slideshow with your family members, or even display the website just to make others see the screen, AirPlay is a definitely an amazing choice.
2. Utilize a Wired Adapter
There are a couple of disadvantages to utilizing a wired adapter; however, the present model is superior to anything it used to be. The issue originates from the way that the Lightning port on the iPhone and iPad isn’t worked to the output video signal. Whatever Apple’s thinking (most likely to take into consideration small gadgets), the usefulness was moved to the adapter.
Since the primary group of Lightning-to-HDMI adapters had issues; they bested out at 900p resolution. Despite the fact that the present models guarantee 1080p, reviews aren’t incredible. They notice issues like successive dark screens and unexpected hardware failure. With the cost tag of $49 and bother included, an Apple TV doesn’t appear such an awful venture similarly.
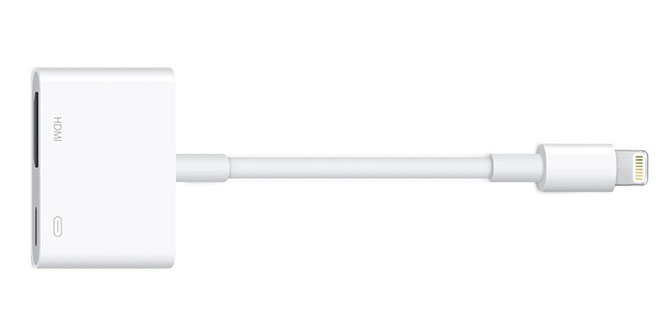
In order to mirror the iPhone screen with the use of a Lightning to HDMI adapter:
- Connect the adapter to a lightning port of the iPhone or iPad.
- Connect the display or the projector using an HDMI cable.
- Switch to the right source on the display in order to see the device that you want to be mirrored.
You can acquire Lightning to VGA adapters as well, which seems to have various similar issues and that doesn’t support the HDCP.
3. Utilize Google Chromecast
You can utilize a wireless “casting” technology by Google in order to stream content from your iPhone or iPad wirelessly, although it functions a bit differently. Google Chromecast is the answer to Apple TV and in the cost of $35 (or $69 for Chromecast Ultra which is 4K-compatible), it permits you for streaming content from the Smartphone to TV.
It is impossible mirroring your complete screen with the use of Chromecast, as Apple simply keeps the technology up to their first-party products.
However, various iOS apps such as Netflix, YouTube, and Spotify which include Chromecast support. Since every app is found to handle the Chromecast integration a little differently, there’s not a single method in order to watch a video or other media via iOS app. In the application, simply search for the cast button that you have been using currently.
How Do You Mirror your iPhone or iPad?
When it comes to AirPlay, it is one of the most expensive and best methods in order to mirror or transfer media to an audio device or remote display. Moreover, given the design of the Lightning standard, wired solutions are found to be problematic as well as inelegant and hence, Apple continues to force push wireless streaming.
In the case, if you are someone with a Chromecast already or you simply feel that you are able to live with no true screen mirroring and make do using the app-by-app compatibility; this one is a great choice to go for. Moreover, when it comes to the AirPlay connectivity at the cost of Chromecast, ensure checking the AirPlay receivers which are quite cheaper than any Apple TV.